Saturday, June 30, 2018

Project Tomato - Update #1


June 24, 2018.

It took longer than I have expected, but I was now able to transfer some of the tomato seedlings to small individual pots.  Some, because I only got to transfer the seedlings from the pot (excess seeds that I was unable to plant on to the 72 hole tray), I have not transferred any from the seeding tray yet (hopefully next week).

I should have done this last June 16, but there was a storm the first two weeks of June, it was raining most of the time and the sun almost never shines.  That had caused the slow growth of the seeds.  I think that today (at least for the ones in the seeding pot), they are big enough for me to transfer them.  And that is exactly what I did today.

I made some compost a few weeks back in the PachamGarden.  I will be using that on the pots where I will transfer the seedlings.

I made the pots where I have transferred the tomatoes from empty Gatorade bottles (I will make another post on how I made them).  But I just now realized that it will be hard to remove the plants once they are ready for transfer to the beds.  Because the base of these pots is larger than its opening or mouth.  Maybe I will have to make a vertical cut in it to get the plants out.  We will soon find that out.

This is the seeding pot.


I have removed the seedlings from the pot.  It's replanting time!
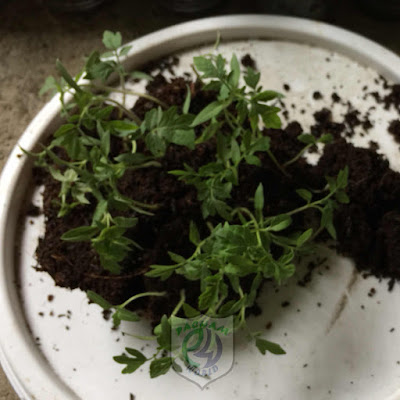

I separated each plant and being very careful not to damage the roots.  This is the problem with this kind of planting from seeds because the roots would be tangled, it is easy to damage the roots.  Unlike that of the seeding tray which you can get the plant and the soil easily without damaging the roots because they have grown in separate holes of the tray.


I then filled the mini pot with soil. And that's it.

The seedlings will stay here for around one month.  Or probably longer, because of the current weather (still cloudy most of the time).  I hope they would grow big and fast.

After they have grown big enough, I will transfer them to the beds in PachamGarden.  Hopefully, that would be on July 28 (Saturday).

Update #2 next time.


Saturday, June 16, 2018

Some Calculations : Battery Capacity


Ever wonder how long your battery will last using a number of light bulbs with a particular wattage?

One formula for power is P = V x I, where P is for power in Watts, V is for Volts and I is for the current in amperes (DC).  Not so simple for people like us, who do not have any electrical or engineering background.

Here is a simplified way on how to compute for it.

Best thing to do is to give an example.

So, how long will I be able to use my 12v, 70 Ah Battery if I am powering two (2) pieces of 5 Watts light bulbs?

First, we need to compute for the battery's capacity.

12v x 70 ah = 840W (V x I = P)

840W is the maximum amount of power stored in my battery, but you cannot use all of that, you should not fully drain your battery.  It is bad for the battery's health 😆.

They have what they call DOD or Depth Of Discharge.  If you want to use only 50% of the battery's capacity then you just have to multiply your total capacity to this percentage.  I am not sure what is the best DOD to use, but since the example given to me was 50%, I assume that this is a good enough DOD.

840 Watts x 50% DOD = 420 Watts, this is the available energy that you can use.

Now for our consumption, we have two 5W bulbs or a total of 10W (2 x 5).  We just have to divide our allowed capacity to this figure.

420W / 10W = 42 hours

This means that your fully charge 70Ah battery can power two (2) 5W bulbs for 42 hours,  and after 42 hours, your battery will still have a charge of 50%.

So, I hope this will help you in computing for the number of light bulbs that you can use, using a particular Ampere battery.  So that you would not over drain your battery, which in turn will enable you to use it for a longer time.

Many thanks to Sir Jun Bro Magno of Solar Ng Pilipino for his advice in this computation.


Saturday, June 2, 2018

Self-Watering Pot


This is my version of the Self-watering pot.  I made this yesterday June 01, 2018 with the help of my supervisor/helper, my son Liam.

I saw this on YouTube a few months ago, and I wanted to check if this really works.


These are the materials that I used.

4 pcs 500 ml Pet bottles
4 pcs of cloth
Soil
Water, and
Plant (for the plant, I used the spring onion that my wife bought, she already used the leaves and was going to throw away the roots, I have other plans for it, to regrow them)


First thing is to cut the bottles in half.  I made the part with the cap a little longer than the other half.  My idea was to have more room for the soil because the plants will get its nutrients from the soil.  I am not sure if that was correct, but that is just my idea.


Then we put a hole in the cap, where we inserted the strip of cloth, as my supervisor/helper is showing in the picture above.


Then lastly, we filled about half of the water container, put soil on the upper part and planted our spring onions.

I poured water on the soil this time, but if this will work, then I will not have to do that again.  But I do have to put water in the water container.

We will check if the water would be absorbed by the soil through the piece of cloth that we used.

Until next time.