Tuesday, August 28, 2018

We Call It Kamansi!


July 02, 2018


My good friend Mr. Kuya Jhen Cantada gave me these seeds last July 01, 2018.

The following day, I planted them!

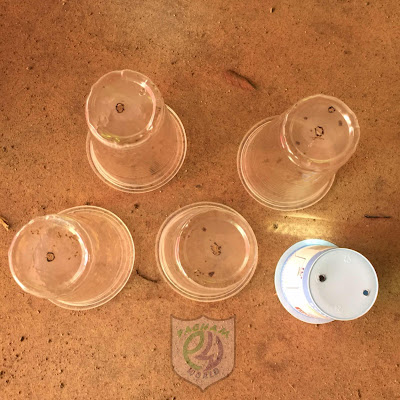
I used these plastic disposable cups as my seedling pots.  I just punched a hole at the bottom as their drainage.


I filled half of it with soil, then I put a seed in each pot.


Then I covered it with more soil.


And there it is, I have planted the nine seeds!


The picture above was taken last July 15.  Two weeks after planting.


And this picture was taken August 05.  35 days after planting.

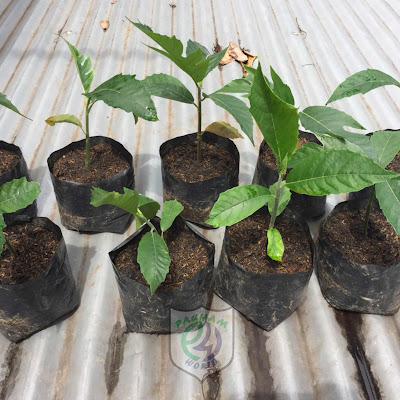
Last August 19, I transferred them to a proper seedling bag.


As you can see in the pictures above, the cups were I planted them are already too small.


I removed them from the cups and planted them in the black seedling bags.


The first picture from this post was also taken last August 19.

I posted that picture on our Facebook page last August 24, with a caption "Now Selling!".  But up to now, no one was inquiring, eheheh.

I have some office mates who told me they wanted to buy,  but they all thought that I was selling Calamansi.

Hopefully, some would inquire and buy our first product.

Until next time.


Saturday, August 11, 2018

Siling Pangsigang - Update #3


August 11, 2018

Look! Look! Look!

Do you see that beautiful bud?!

I am just really happy and excited about this.

These were the Siling Pangsigang that I planted last June 02, 2018.

Let us take a look at the timeline for this project.

June 02 - Seeds planted to seedling tray (72 hole tray)

July 07-08 - Transplanted to seedling bags (One month five days or 35 days after planting) (70 pcs)

August 11 - Saw the first sign of fruiting (70 days after planting and 35 days after transplanting)

Only seventy days, wow!

Here is another one.


Of the 70 pcs that I have transplanted, only 45 remains.  32 are in PachamGarden, 6 I will give to my officemate and 7 are on top of the roof (Yes G.I. roof).

I was not able to go to PachamGarden today because of the rain (there is a typhoon again), I will try tomorrow to see if they also have some buds on them.

So, you might be thinking what had happened to the 25 pcs.

Here is the story.

I have placed all the seedling bags in our garage (ground made of concrete).  Unfortunately, Termites, yes Termites used it to crawl to one of the wooden beams, and they were starting to make our home theirs.  I cannot allow that.  So I removed the seedling bags outside the garage.  I put some motor oil on the wood so they would not go back, and it seems to be working.

I thought that the bags would be better outside because I only saw minimal growth while they were inside the garage, probably because they were not getting enough sunlight.  Unfortunately (again), my father's calves made them their playground.  They have walked all over the bags, and the 25 did not make it.

On that same day, I transferred the 32 pcs to PachamGarden (I can only fit that much in my car), the rest I have put on top of the roof.

So, that was the story of what had happened.  Why some are on the roof and why only 45 remains.

But I am really happy that I saw some signs that they were ready to fruit.

Until next time, hopefully, I would be harvesting these on my next post.


Wednesday, July 11, 2018

Siling Pangsigang - Update #2


July 07-08, 2018

I have transferred the Siling Pangsigang to the seedling bags.

It had been 35 days since I planted the seeds in a seedling tray.  I think they are big enough to transfer to a bigger container.  It took me 2 days to transfer 70 pcs.

I had to buy some soil and seedling bags.  6 bags of soil (₱200.00) and 100 pcs of seedling bags (₱100.00).


Let the transfer begin!

How I wish it was that easy.  It takes patience, I had to do it 70 times. 

These are the Chili seedlings in the tray.  The one that I planted last June 02.


So, this was how I did it.


First, I filled about half of the seedling bag with soil.  Then I dug a little hole in the soil where I would plant a seedling.  After that, I took out a seedling from the tray.  And dropped it in the hole, then covered the roots with some more soil.  That's it!  Easy.

The seedling tray really was very useful, the roots were not damaged, or any damage made to the roots was very minimal and would not hurt the plant.  I would really recommend using the tray.  

To get the seedling out of the tray you would just need a nail.  There is a drainage hole in each of the sections in the tray.  Just push the seedling out of the tray using a nail through that drainage hole and the seedling would come out easily.

The first picture in this post are the ones that I was able to transfer yesterday (July 07).  36 pieces.

These are what I have accomplished today (July 08, 2018).  34 pieces.


My plan is to put a little more soil as they grow.  That is why I did not fill up the bag with soil.

When I bought the two plants that are now in PachamGarden, they were just in seedling bags this size, so I hope I could also make these seedlings grow to bear some chilies while they are in these bags.

Now, that's a lot of Chilies if that would happen.  And I do hope it will.

Until next time.