Sunday, May 27, 2018

Project Tomato


May 27, 2018.

I just finished planting the tomato seeds that I bought last Friday (May 25), finally!

I was watching a lot of YouTube videos about urban farming these last few weeks.  Mostly, the videos in The Urban Farmer channel of Curtis Stone, and that of Nature's Always Right channel of Steven Cornett.  The videos that they took from their urban farms were really amazing and inspiring.

I really want to have those vegetable beds in my yard as well, but the temperature in the Philippines at the moment is really high.  The weather app on my phone says it is 34° C today, and also, the soil is really dry.  But if I really want to have an urban farm, I must start with something.

And the plant that I choose to grow first is Tomatoes.

I chose tomatoes because maybe, by the time I planted them on my beds, the weather will be a little bit colder (hopefully).  I also wanted to grow some Lettuce, but because of the current temperature, I do not think that lettuce will grow well.  So, maybe I will try to plant some of them around July or August.

So, last Friday, I was able to buy some seeds, and I also bought a seeding tray and the seed raising medium.

And I worked on them today.


The tray that I have has 72 holes in it.


I filled the tray with the seed raising medium.  I will be using the Beef Steak Tomato today, the other one I will plant next time.


I punched holes in the tray using my index finger.  The holes are as deep as the first joint of my finger.


Then I drop a seed in each hole.


Then I filled the holes with more of the seeding mix.


Then finally, I watered the tray.

The tray only has 72 holes, so the rest of the seeds, I planted in this pot.


So, these are the ones that I planted today.


They said that I should let these tomatoes grow for about 18 to 20 days in this tray, and by the time when I can see some roots on the trays drain holes, that is when I should transfer them in a pot.  And after around 30 days in the pot, I would then transfer them to my beds.

That is it, for now, I will make my update after 20 days, that's on June 16.

Hopefully, the update would not be "all the tomatoes that I planted died" ehehehe.


Monday, May 14, 2018

Chicken and Corn Chowder


April 21, 2013

Ingredients:
3 pcs potatoes
1 can cream of corn
1/4 chicken breast
1/2 chicken broth cubes
1 onion
1 small clove garlic
1 tbsp butter
1/2 cup evaporated liquid creamer

Boil chicken in 4 cups of water with chicken broth cube.

Peel and cut potatoes into small cubes, chop the onion finely and crush the garlic.

Melt the butter in a large saucepan, and cook the onion and garlic gently for about 8 to 10 min. until soft.

Add the potatoes, broth and evaporated liquid creamer, then bring the mixture to a boil, and then reduce the heat and simmer with top partly covered for about 15 min.

Add the corn and simmer again for about 5 to 10 min until the potato is soft, with top partly covered.

Put mixture in cups and serve.

The end... enjoy :-)


Sunday, May 13, 2018

Welcome to the PachamGarden Family!


May 13, 2018, a day before the barangay elections here in the Philippines, it is a Sunday, and also Mothers Day.

Happy Mothers Day!

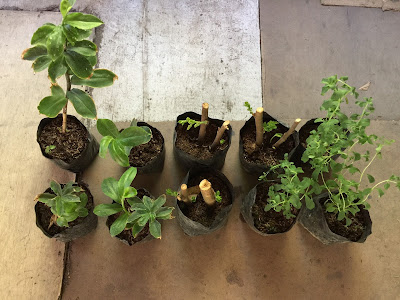
Now I would like to welcome three new plants to PachamGarden!

Stevia


We bought three plants for Php100.00.

The leaves of these plants are used as a sugar substitute.  And they really are sweet!


Insulin Plant


These ones are expensive, at Php250.00 apiece.

The plat is gaining popularity nowadays because of its purported anti-diabetic properties.  There had been some studies about it that ware done in India.  I have yet to read those reports, (and I think, I would not be able to understand them anyway,  eheh) but as one who really likes sweetened beverages, I should hope that this can help me regulate my blood sugar (so I can drink more of that stuff).

and lastly.

Mulberry


At Php50.00 each bag.

The seller told me to just pick the ones that I want, and I have chosen those that have two rooted cuttings in them.

I saw an FB post before, and she was selling a rooted cutting at Php250.00 each.  Or you can also buy 50 pcs of cuttings, at Php800.00, but those are cuttings only, no roots yet, and you would probably be lucky if 50% of those would survive.

Luckily, we found this.


My wife and I celebrated Mothers Day by having lunch at The Dining Room of the Gourmet Farms in Silang Cavite.  But the real purpose of going to Silang was to buy the Insulin Plant.  The lunch was my Mothers Day treat for her.

My wife Lanie was the one who saw the FB post of the seller, and she contacted the seller regarding the location of their garden.

When we arrived at their place (I had a different picture in mind about their garden), I was really amazed.  Because I thought that their garden is like the typical ones along the roads in Silang, Cavite, but theirs were different.


See, it's an apartment type compound and the plants are just outside their doorstep.  And it is a concrete walkway even.  But the plants are really healthy.  Great right?

Here are some more pictures of their garden.


Small space, concrete walkway, no soil at all, except for those that are in the seeding bags, but this is really great.

They have many plants for sale in their place, like Kalamansi, Lemon (the green native one), sunflower and even strawberries.

Next time, when the temperature in our place is a little bit colder (maybe around June or July), I would get me some of those strawberries.

The owner of this garden is Miss Analyn Pascua, and you can look for her at FB's Marketplace.

Thank you and Happy Mothers Day Miss Analyn.


Friday, May 11, 2018

Saving my Azolla


(May 09, 2018)


The picture above was taken May 09, 2018, two days ago.  Now is May 11, and this is (unfortunately) how it looks today. 


 Note that in this picture, I have already added water in the container, when I saw it yesterday, the water level was less than half.

So, what happened?  My father’s cows are what happened. 

It is a very hot summer in the Philippines right now, and in the evening of May 09, the cows saw my Azolla bucket and decided to eat them and drink the water.

These are the last of my Azolla.  I gave the large Azolla tank back to my father so he can use it for his cows.  They really need a lot of water this summer.

As you know, I also have two backup Azollas in small containers, but this is how they look as of May 09.


Dismal, right?

Google weather says its 33°c now, but in the previous days, the temperature was really higher.

Back to the bucket.  So, I cleaned the bucket and change the water and the cow dung solution.  I added another bucket where I can put them, hopefully, this could save them.

First step


I transferred all the Azolla to the large black basin.


Then I set the two pails.


Then, I transferred the remaining healthy Azolla’s back to the growing containers.  Unfortunately, these are all of them.  The others are mostly dried and dead.

I also transferred one of the dismal back-up Azolla to a larger container and put it in a cage so that the cows would not be able to get them (hopefully).


The two containers, I placed inside our gate so that (again), the cows would not be able to eat them, and I am really hoping that these remaining Azollas would grow.


Monday, May 7, 2018

I Got Duckweed!


(Picture January 26, 2018)

Last January 20, 2018, my college friends and I went on a road trip.

Destination: Bulacan, to the house and chicken farms of one of our friend, Mr. Edsel Escudero.

But this is not about the road trip, nor the farm.  This is about what I found from one of his farms, DUCKWEEDS!

I remember when I was a kid that duckweeds grew abundant in a stream near our house, the stream is still there, but the duckweeds were no more.  And I have been looking for this for quite some time now (well, since I learned about Azolla actually).  Because, before, when I search online about Azolla, some pictures that I saw were that of the duckweeds.

Both the Azolla and the duckweed grows on water, on the surface of the water, maybe that is why some people show duckweed pictures instead of Azolla.


My friend Edzel has a pond in one of his farms.  He said that the previous owner of the property was going to make it a vacation house, and he had that pond dug because he wanted to construct a swimming pool, but unfortunately for him, he got into some financial problems and he had to let go of that property. 

Back to the pond.  I remember Edsel asked me before if he can grow Azolla in that pond, that was when he saw my Azolla Project blog. But he did not show me a picture of the pond then, so I did not know that he had duckweeds in it.

While he was giving us a tour inside one of the buildings of his layer chickens (it was an elevated building), I saw the pond, and the water was covered in green, and my eyes twinkled because I knew at once what that green thing was. DUCKWEEDS!

(I was looking for the picture from that vantage point inside the building, but unfortunately, I do not have it.  Probably got too excited to go down and forgot to take the picture)

I asked him to go down the pond to take a closer look, he said that they call it ‘Lumot’, and I told him that those are duckweeds, and it is just like Azolla.


I took some of it home.

And that is how I got my duckweeds.

As of writing date (May 02, 2018), I have yet to study it, but I am using the same style I use to grow my Azolla, I just noticed that they grow a lot faster than Azolla.  More on that in my next post.